
Welcome! This is a new blog series where we will be sharing the behind the scenes from our shoots. We have done lots of different and experimental photography at Block Art and we will delve into how they were set up, the equipment we used and all the things we learnt along the way.
On our most recent photography meet up we decided to take portraits using UV paint. The event was hosted at our regular indoor home at the Jolly Sailor pub in Canterbury. I had seen a few images using this effect on Instagram and I was itching to try it myself
THE GEAR
Lenses: I mostly used one lens during the shoot; my favourite go to: the nifty-fifty (50mm F1.4). I like this lens for its portability (i’m often cycling with the camera in my backpack) and it offers fantastic low light capabilities which was a must for this shoot.
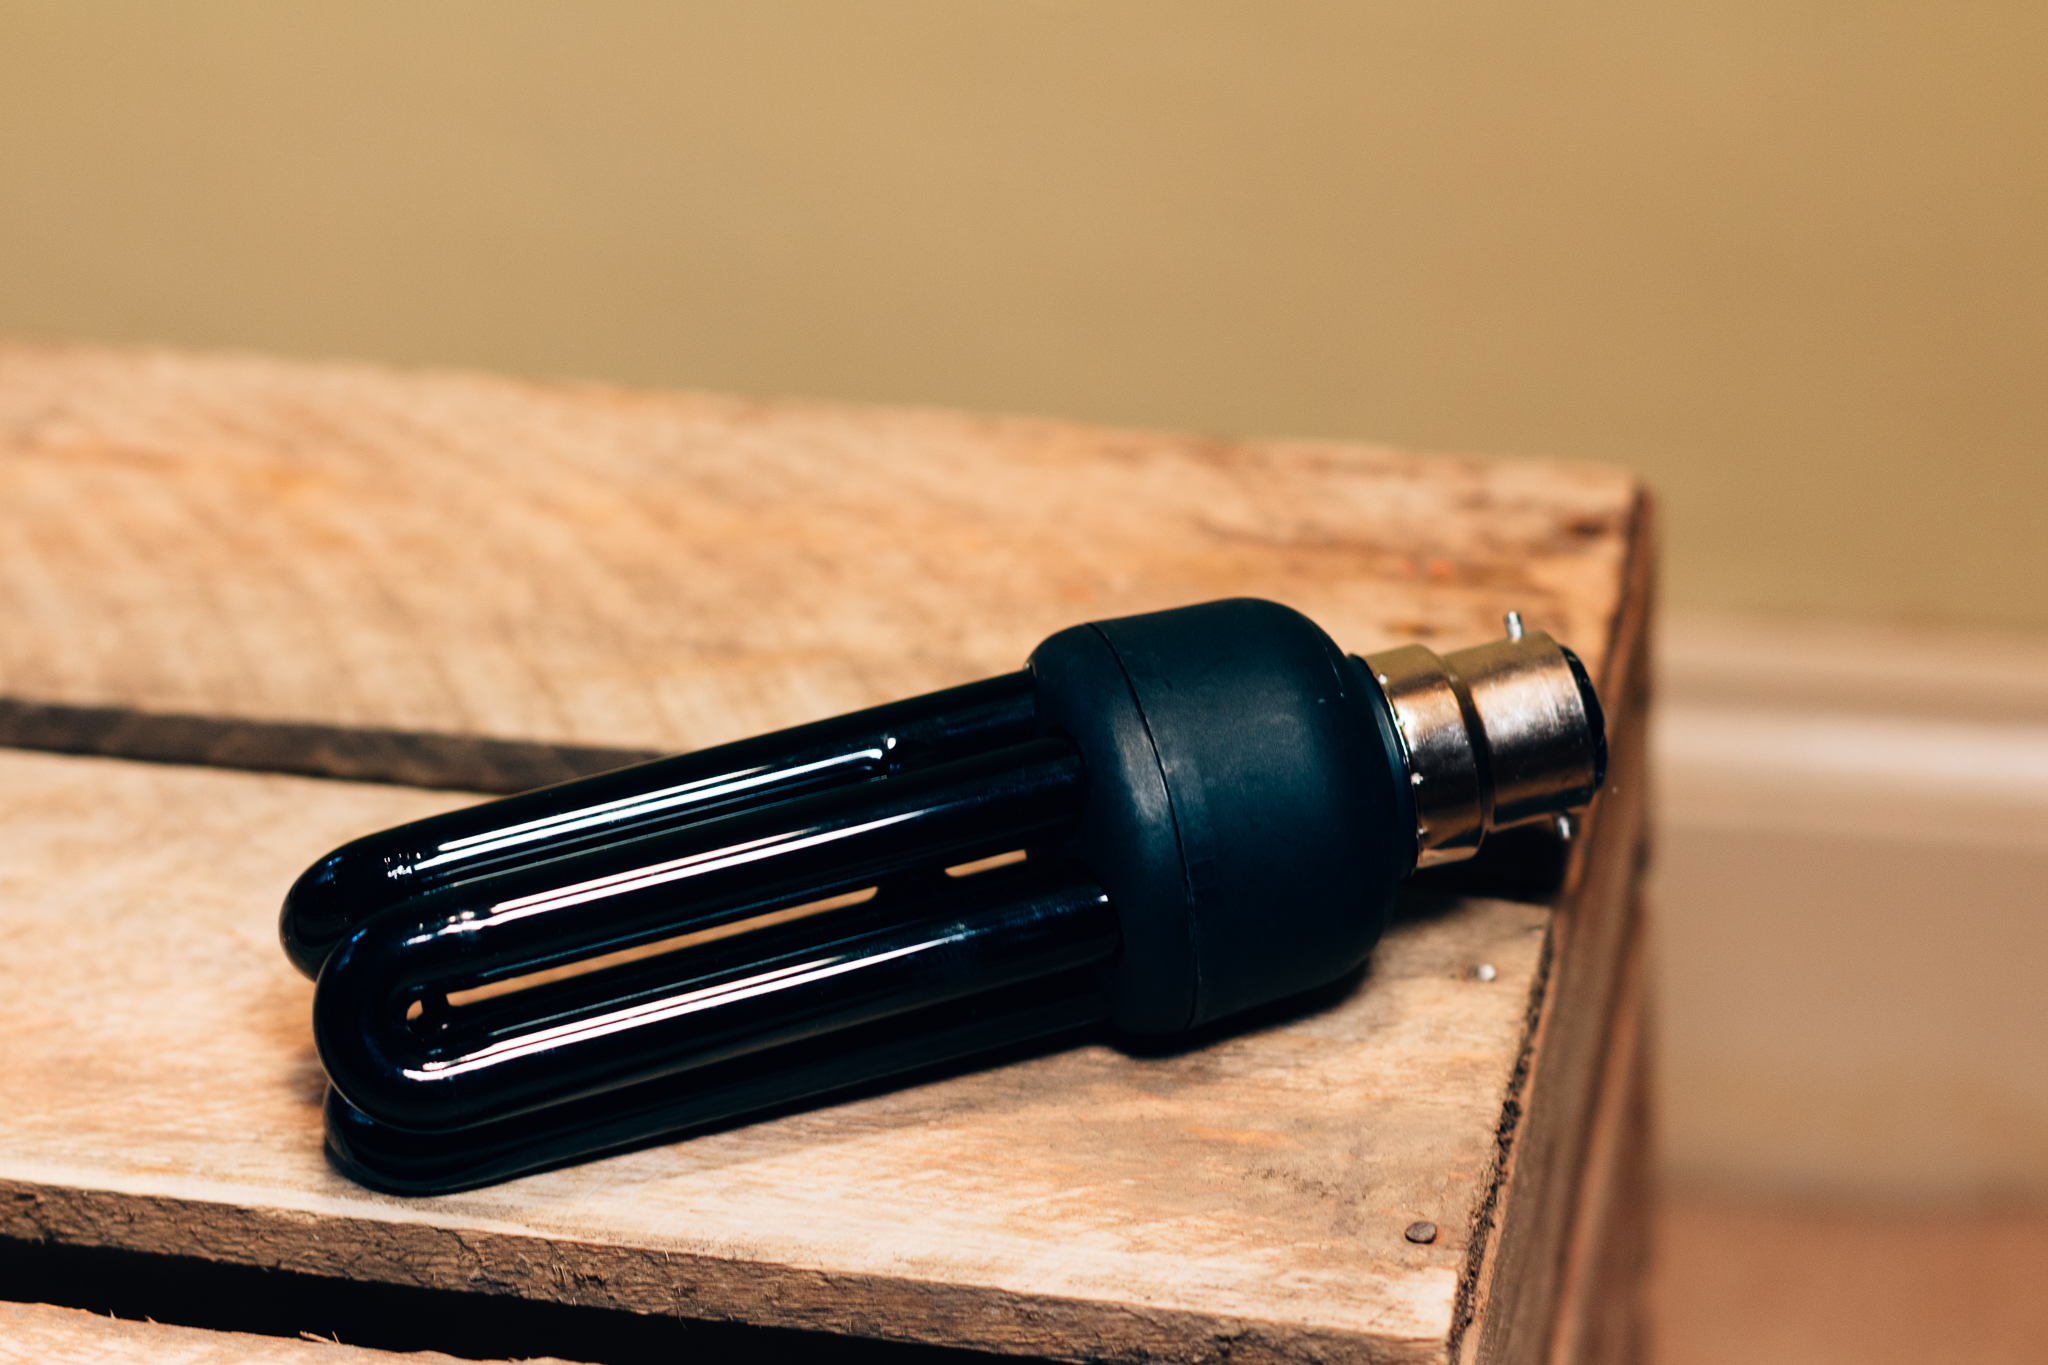
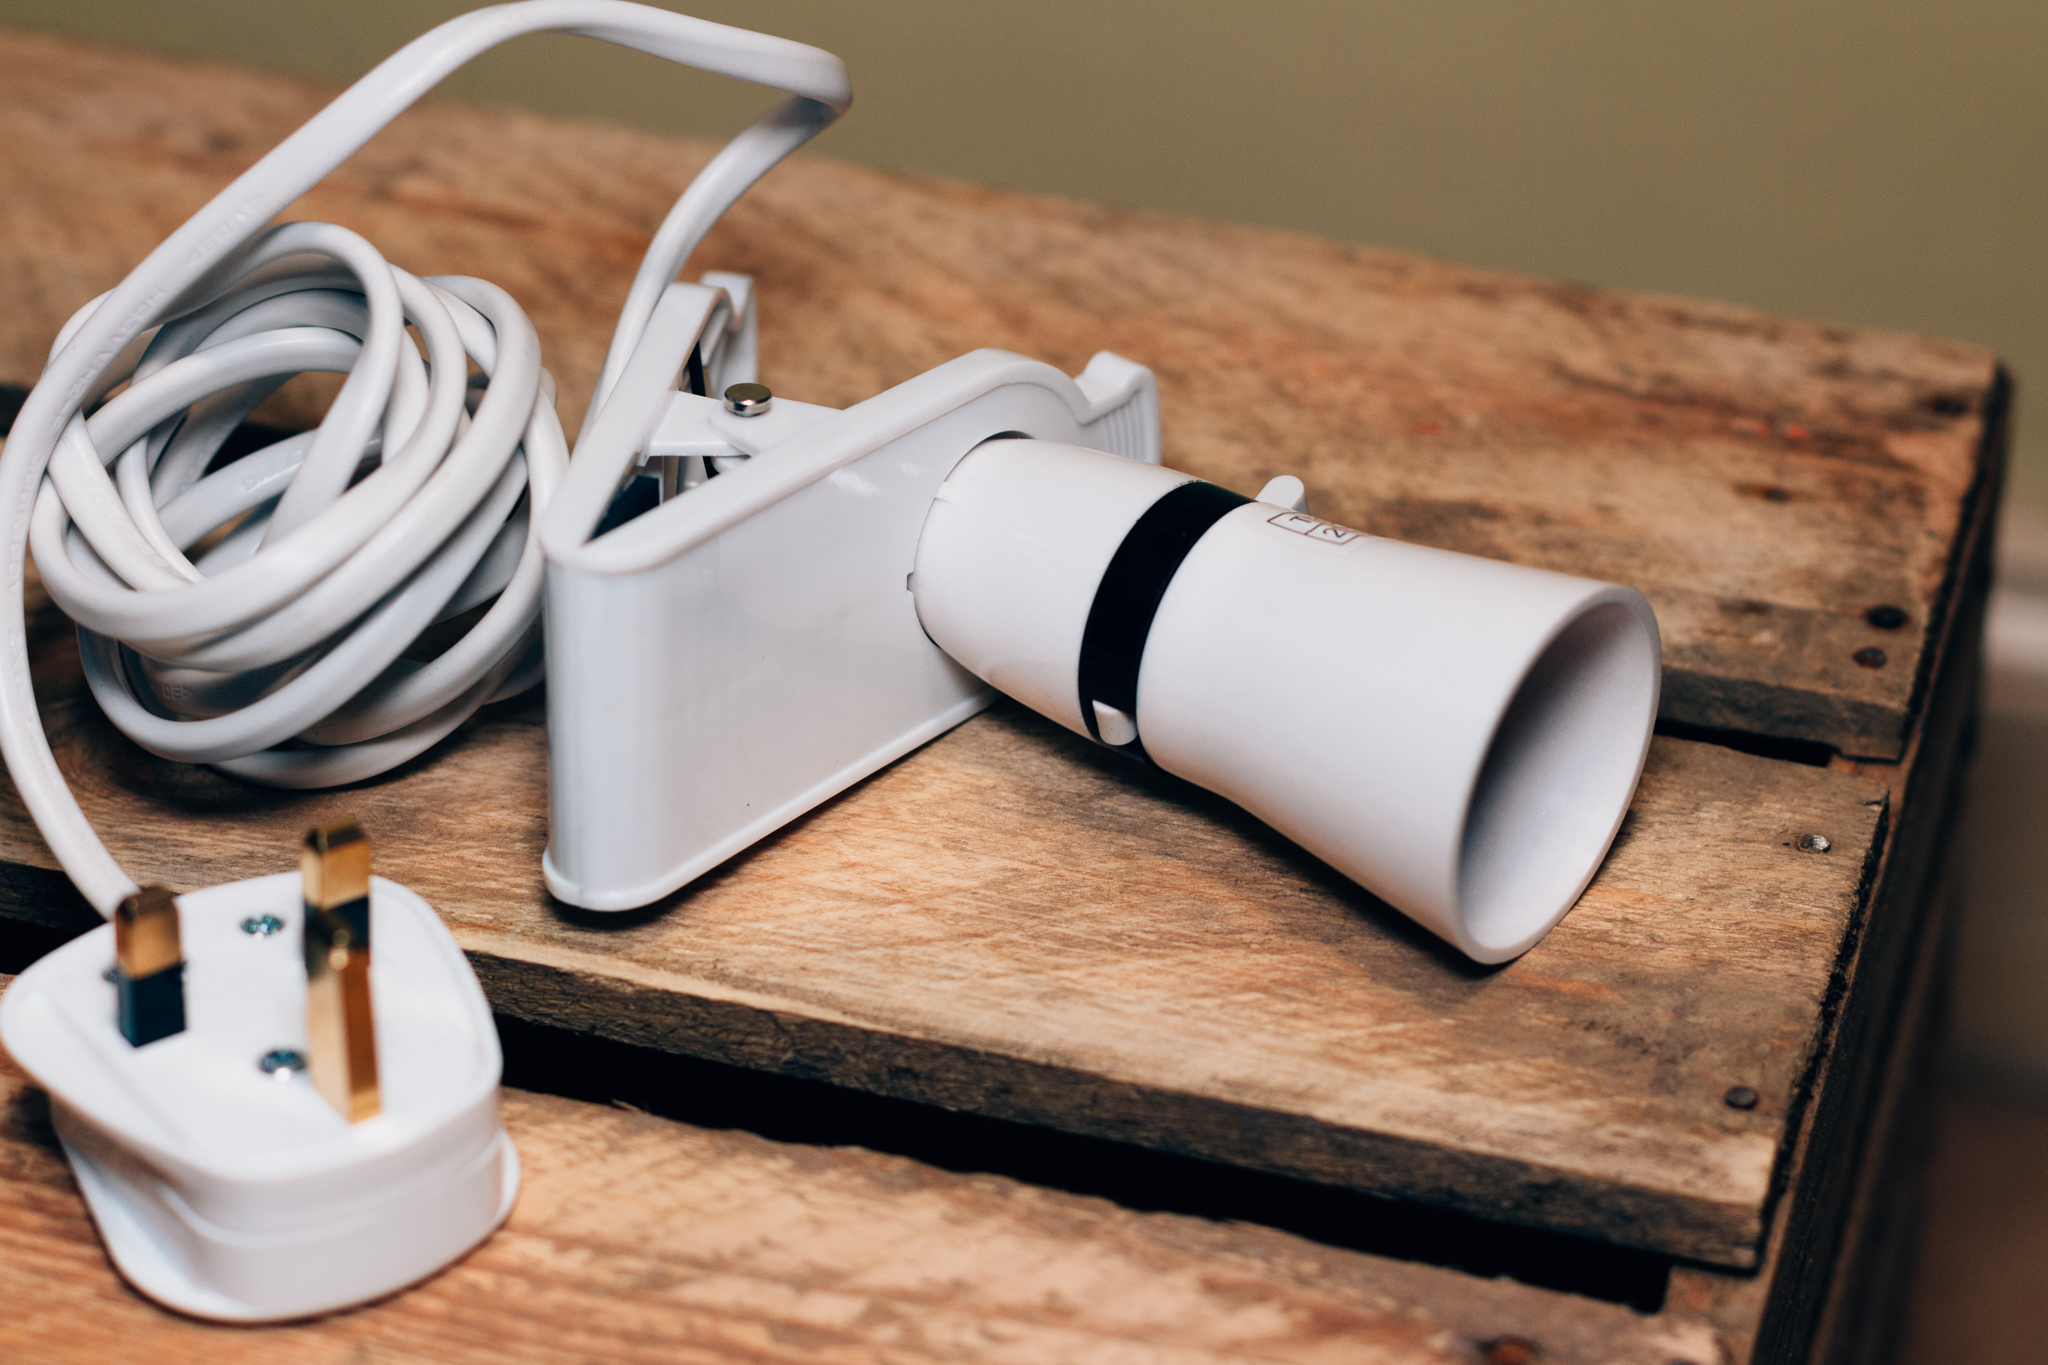
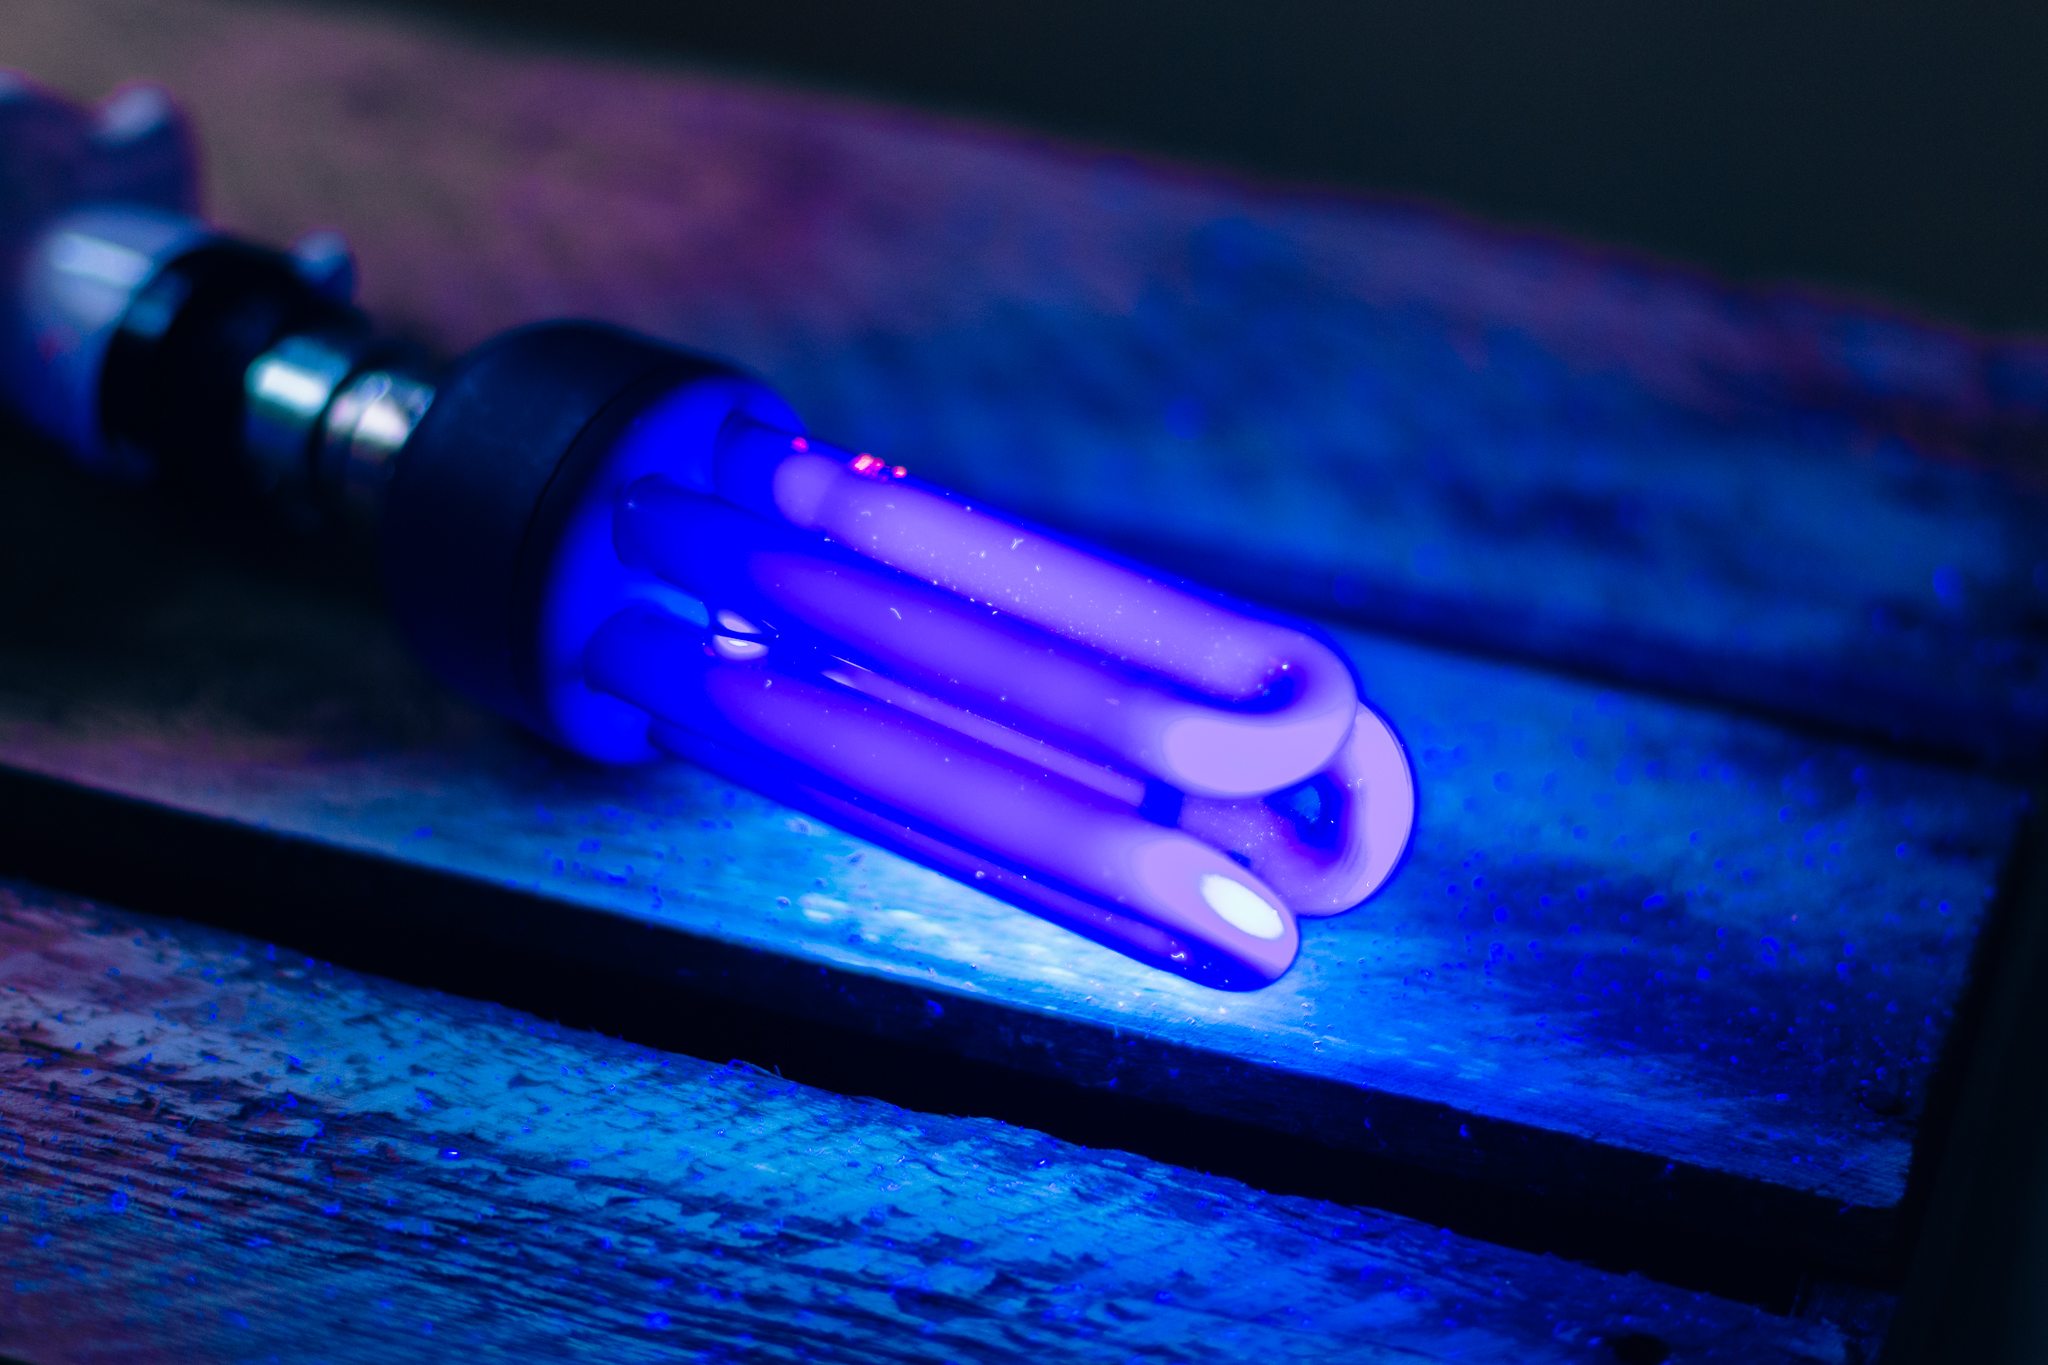
The lighting: I opted for a 20W UV bulb and a bulb holder. The bulb holder had a clip built into it which came in handy for mounting it at various angles. I also used an off camera flash triggered via a radio controller.
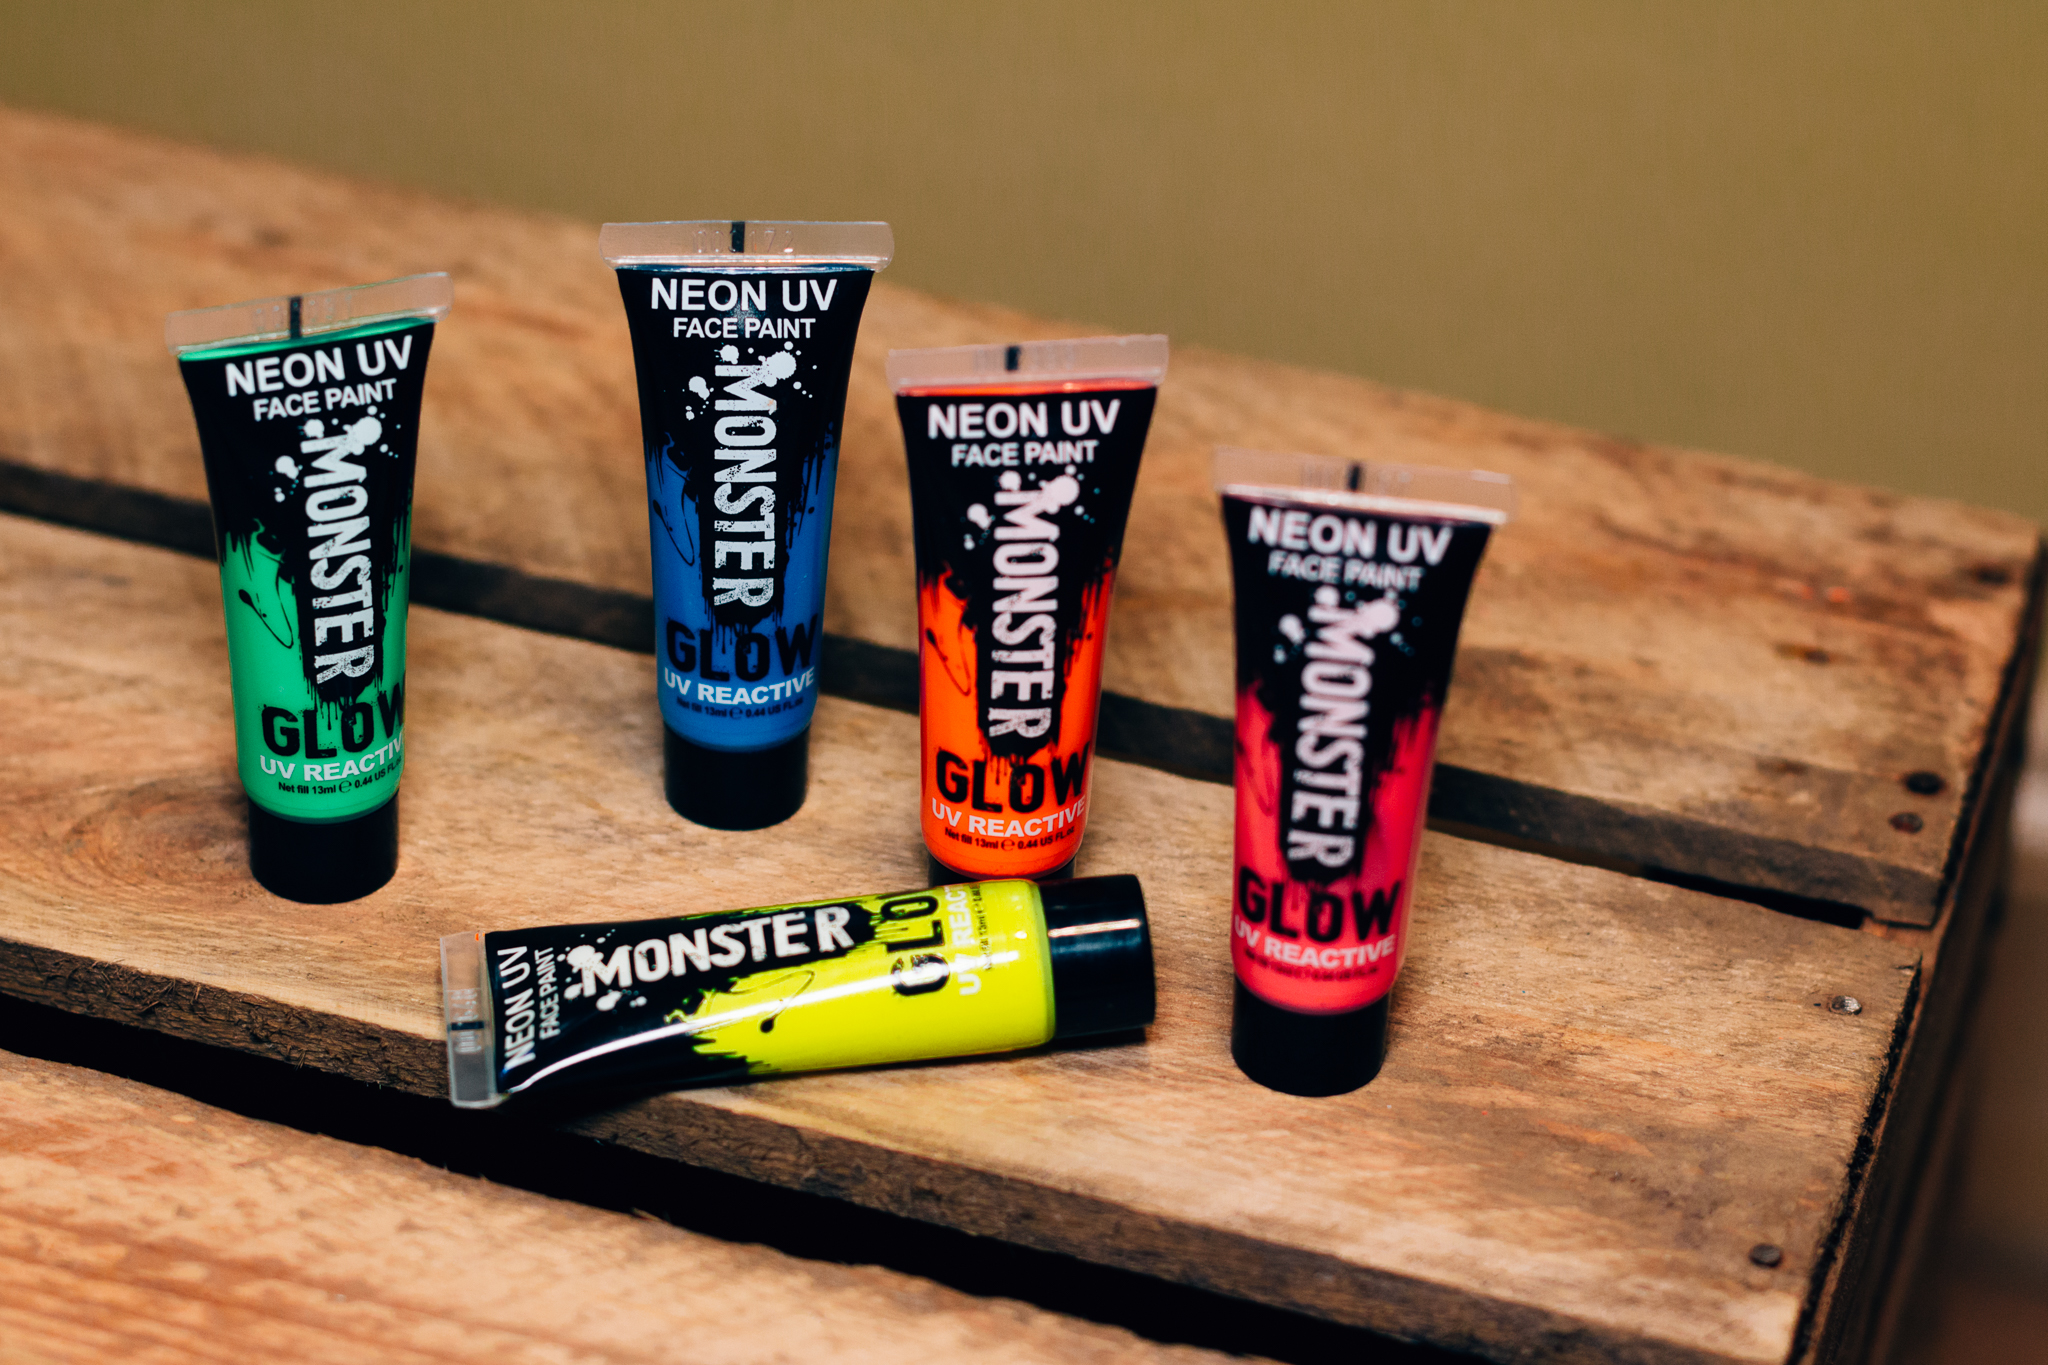
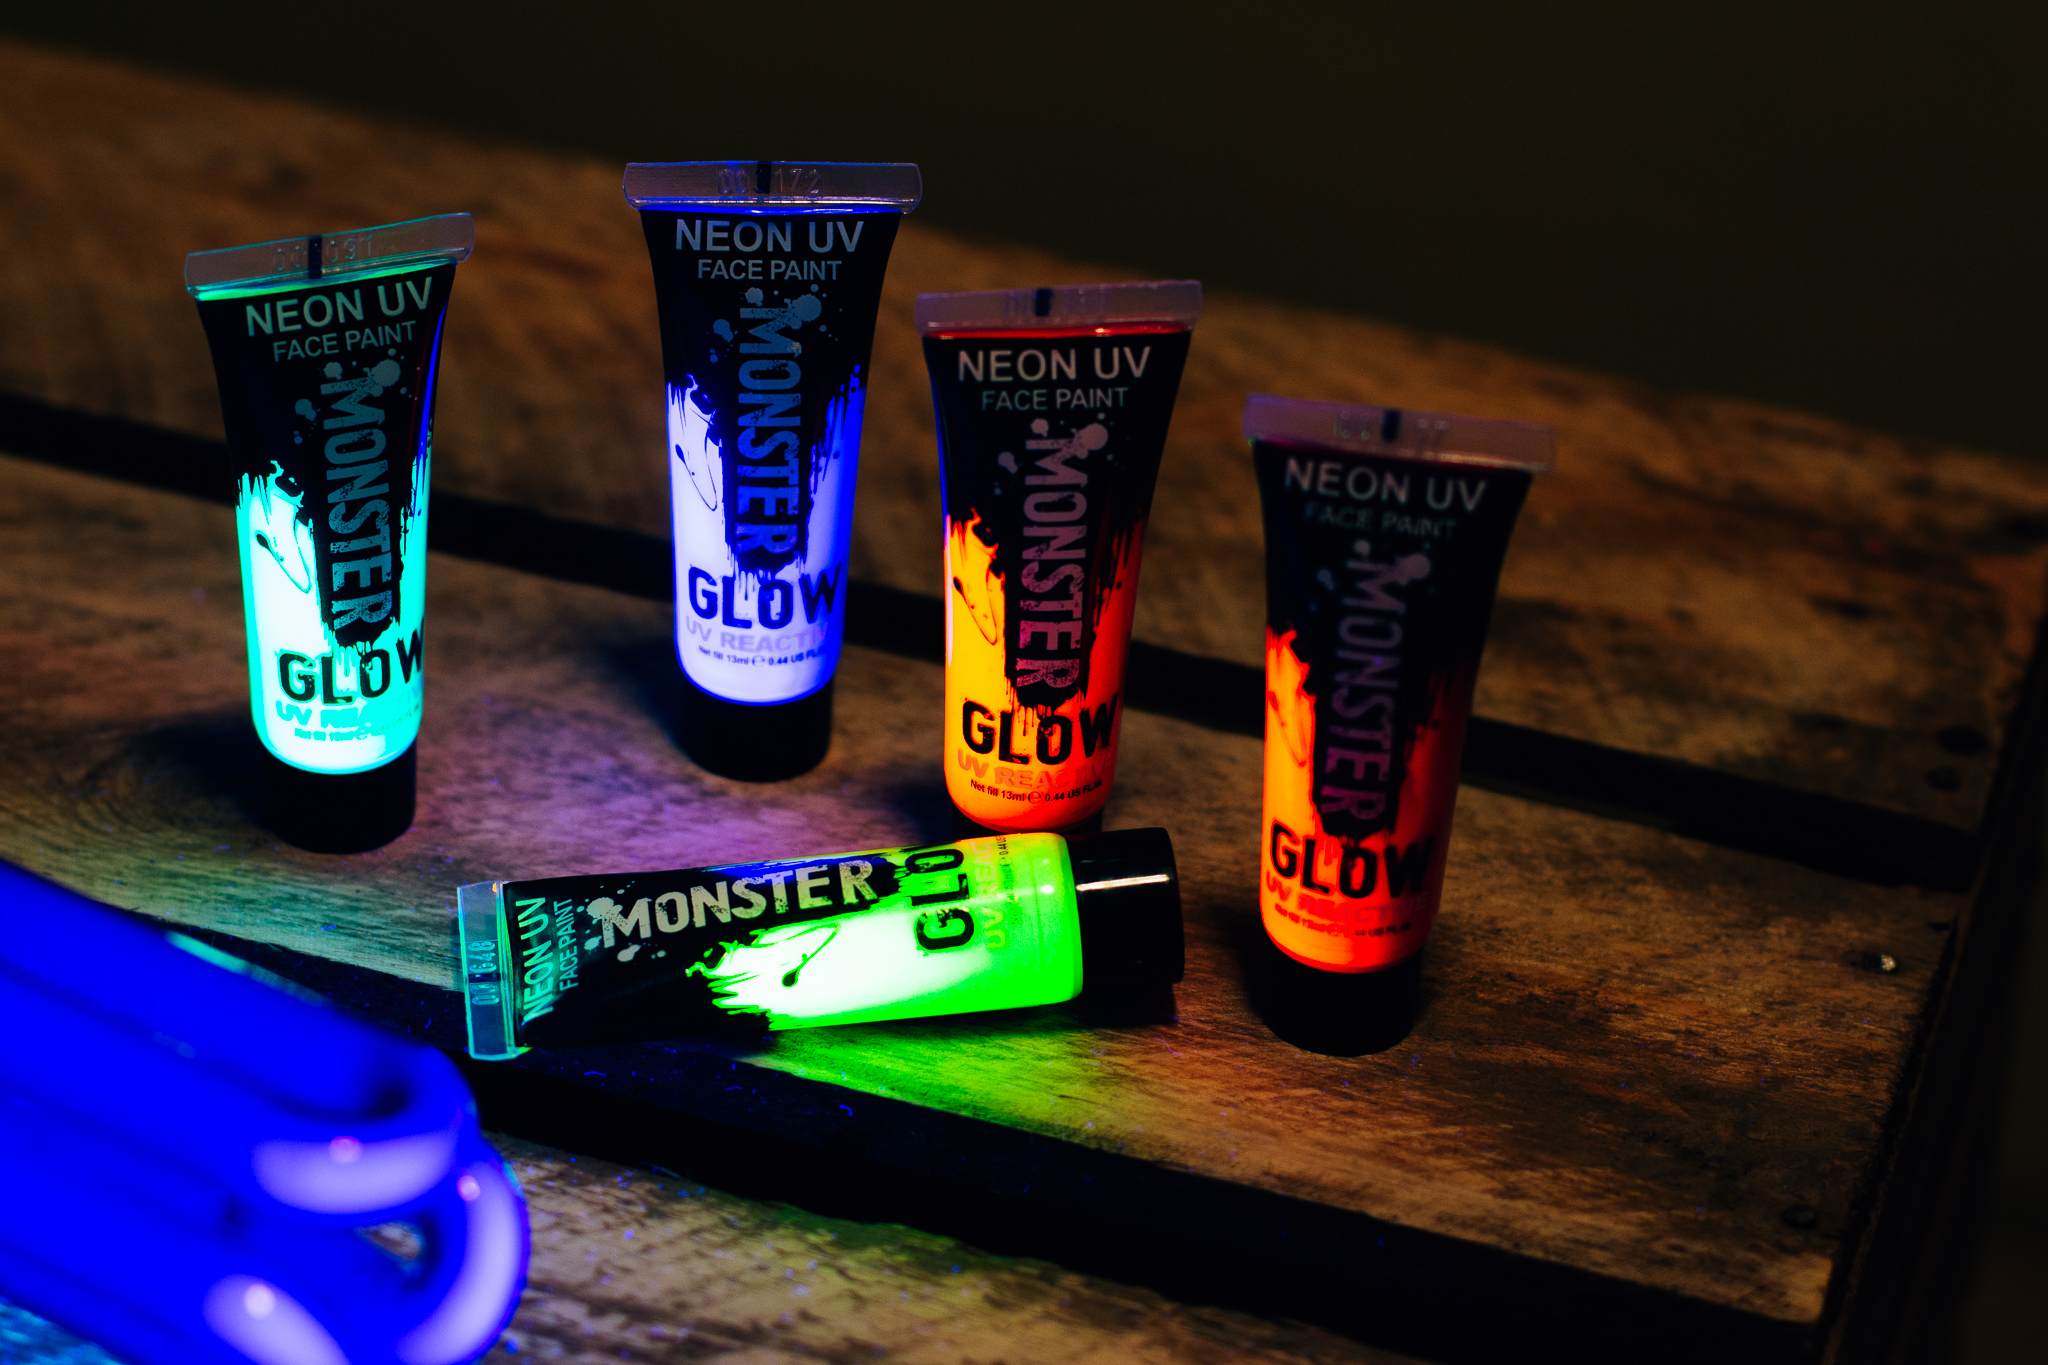
The paint: We used various UV paints and a couple of different makeup brushes and paint brushes.
(I’ve linked all the products you’ll need at the end of the post)
The shoot
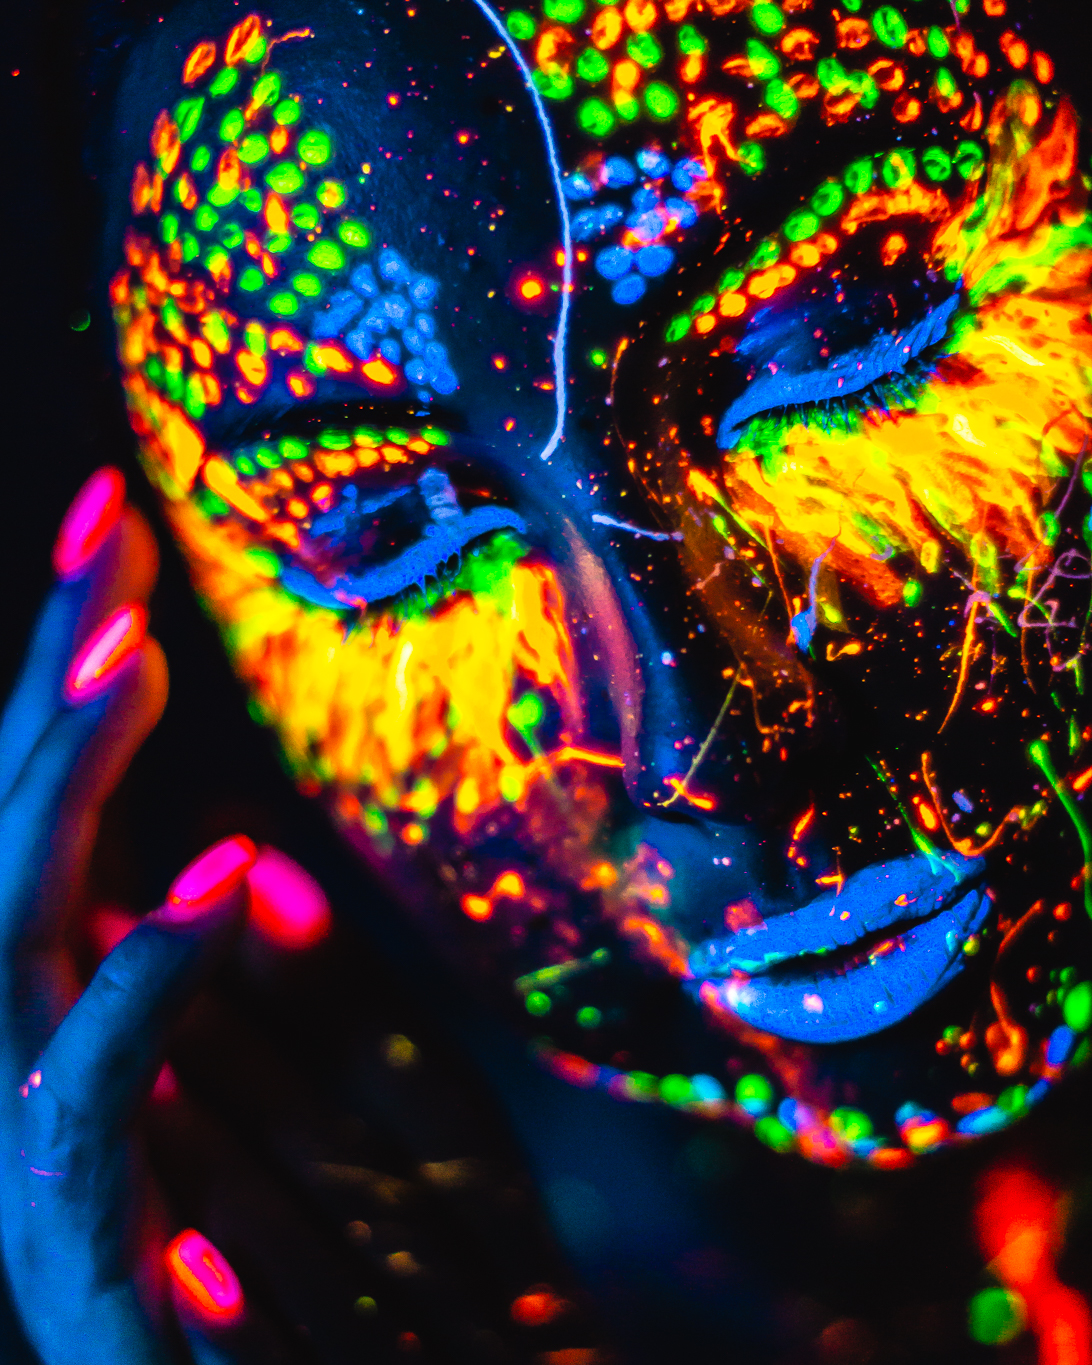
Our resident model Hrista applied her face paints while we set up our gear. Hrista wanted the makeup to appear as a burst of light around her eyes. She created a striking pattern using various colours including splashes of paint to appear like a big explosion of paint stars.


Once Hrista had finished the amazing paint work, I tried moving the bulb around different distances from her face. In order to make the glowing paint visible I had to kill the ambient light in the room. Bringing the lamp near to Hrista and just out of frame of the photographs caused quite intense glow and pop to the paint. Moving the lamp further away gave a lovely subtle glimmer to the paint. I mostly shot using wide apertures (at f1.4-2.0). I was manually focusing on a tripod so this didn’t cause too many focus issues. Ideally having the aperture it a bit narrower (f5.6 or above) would have given me better depth, but the light was very limited. I kept the ISO at 200 to avoid grain. The shutter speed stayed between 1/50-1/25 this was enough to kill the remaining ambient light of the room but allow for the paint to still show up. This led to some pretty out of this world, science fiction style shots, something I could imagine in the Bladerunner universe.


To mix things up I then experimented with backlight/rim lighting to add a bit more depth to the portraits. I set up a wireless remote triggered flash just behind our model. I added an orange gel to this backlighting to add some complimentary colour that would contrast to the purple/blue tone of the UV bulb. The flash was pointing towards the back of her head. As with the previous images I killed the ambient light to isolate the subject.

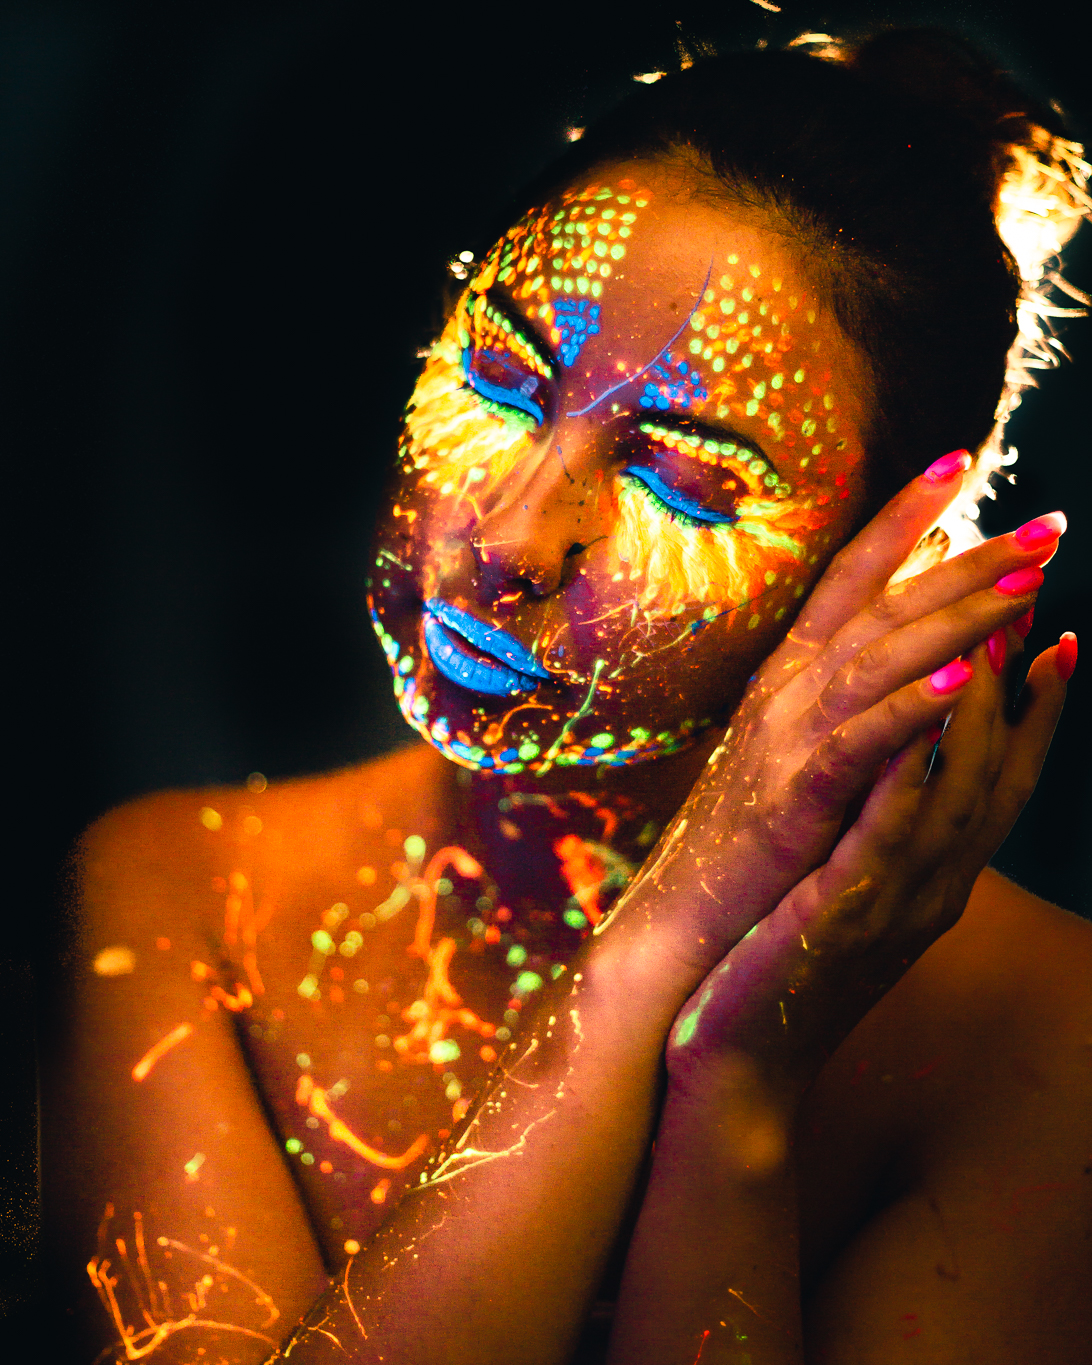
With the second set of shots, using flash I also experimented with the use of a silver reflector to help “capture” more of the UV light and provide increased illumination from the bulb, which worked very effectively. This can be seen on the right hand side of the image below:

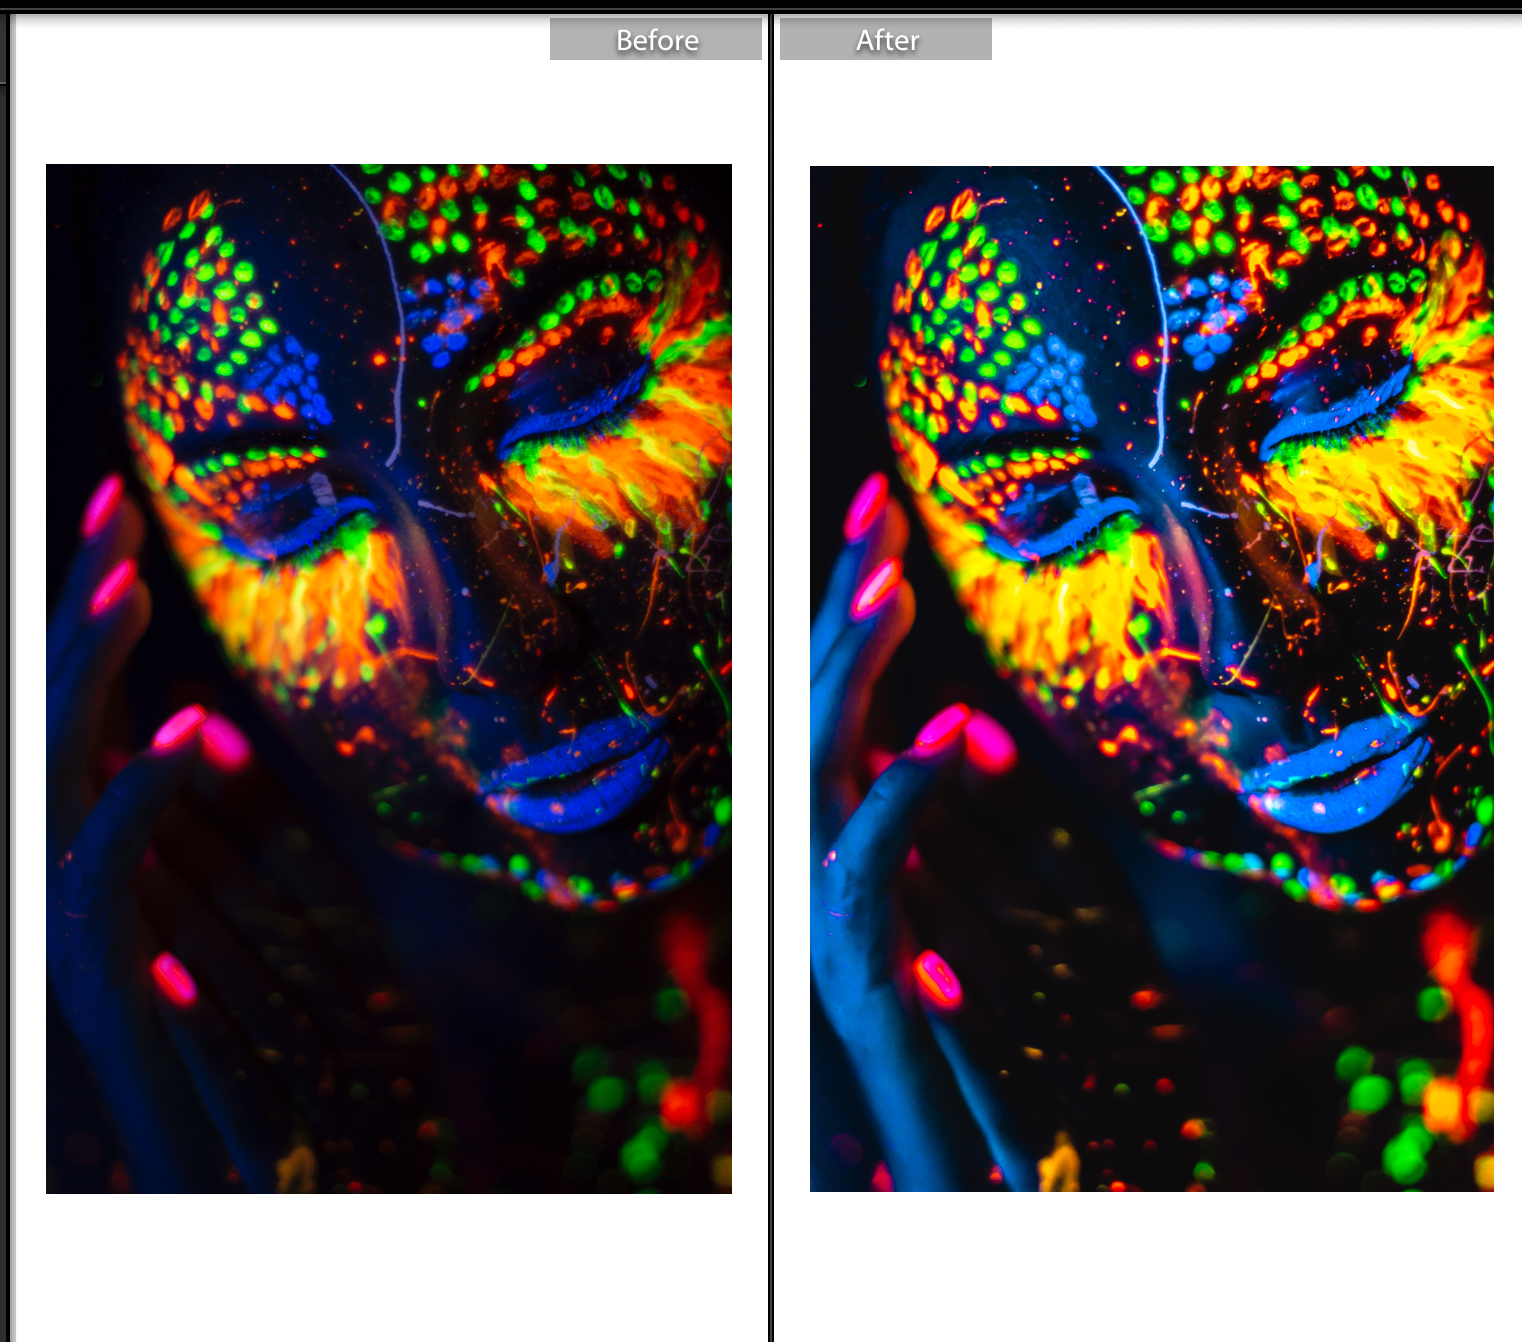
All editing was done via Adobe Lightroom, the effect was very cool Straight Out Of Camera (SOOC). I mostly increased the clarity to bring out the paint some more and changed the hue of the blue to a more aqua tone, which was just personal preference. An example of the before and after can be seen below.
Closing thoughts
The photos produced were very experimental and not to everyone's taste but it was so much fun to shoot and play around with the glowing paint. I went for some pretty extreme and surreal images inspired by science fiction, but a more subtle use of the UV paint and lighting could also produce beautiful photos.
It was the most fun i’ve had shooting in a while. Combining both flash and UV lamp worked very well and I was still finding new shots and ways to play around, right up to the end of our 2 hour shoot.
I hope this has inspired you to try out your own UV portraits! If you’d like to know more or have any questions feel free to leave a comment and I’ll get back to you!
The photography meet-ups we host are events held in and around Canterbury; so if you’re a photographer who’d like to come along please send us a message, comment or email to find out more!
Credits:
Big thanks to Thom Toop who took all of the behind the scenes shots featured here and helped massively with positioning the light. He also took some fantastic shots which were recently featured on our facebook page:
https://www.facebook.com/pg/BlockArtMedia